PS制作Google Chrome瀏覽器Logo圖標
2022-12-26 13:43:22
來源/作者: /
己有:39人學習過
Using the same tool, try to make the next layer of the same element. Firstly apply the Ellipse Tool (U) to mark out the outside edges of the layer and then choose the Pen Tool (P) to cut out an inside opening. Its shape may be corrected with the Convert Point Tool.
再用橢圓工具重復上一步驟,畫一個同樣的圓邊緣與之前的重合(譯者:或直接復制一層去掉圖層樣式),然后用鋼筆工具(P)在其內部切出我們需要的形狀(譯者:選擇"從形狀區域減去"或按住Alt鍵),然后利用轉換點工具進行調整


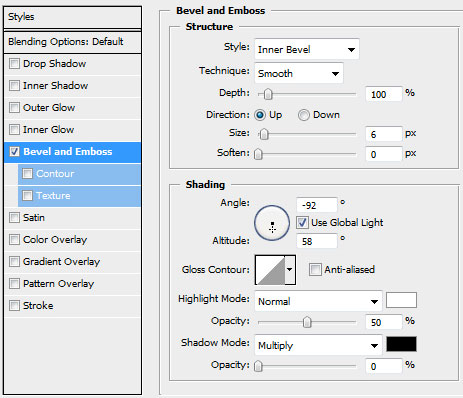
設置圖層樣式,選擇斜面和浮雕(參數如下)

將此圖層復制一份,使用自由變換工具,選擇保持長寬比,均勻的縮小圖層,去掉圖層樣式.選擇顏色#4E4A4A,然后把這個復制層放在原圖層的下方.這將作為陰影效果層

標簽(TAG) logo教程 PS制作瀏覽器 PS制作Logo圖標
上一篇::“新視覺”風格的Logo
相關推薦

ps cs6設計龍主題LOGO教程

火焰Logo教程

用ps制作蘑菇logo教程

ps兩步制作Google Logo教程

Photoshop制作清涼的水中展示網頁

Photoshop制作大氣的網頁設計主頁

陰影教程,超詳細的各種陰影的制作方法

Photoshop制作炫酷的PK類網站Banner


